
We build a lot of our websites using WordPress. It provides a lot of great functionality for users out of the box, and we find that it can handle pretty much anything we can throw at it.
As we now have a lot of clients using this system every day, we thought it would be a good idea to begin posting a series of hints and tips about WordPress. This is going to range from quick tutorials on how to perform certain actions, through to specific pieces of functionality that you might not know about.
For our first article we are going to show you how you can edit images directly in WordPress, without the need to re-upload images multiple times. This can save you a ton of time, if you just want to perform simple actions like cropping, rotating or resizing an image. Lets get started.
Once logged in, use the navigation to navigate to the ‘Media’ section of WordPress. This is where all of your uploaded media, such as imagery and video, is stored once it has been uploaded to your website.
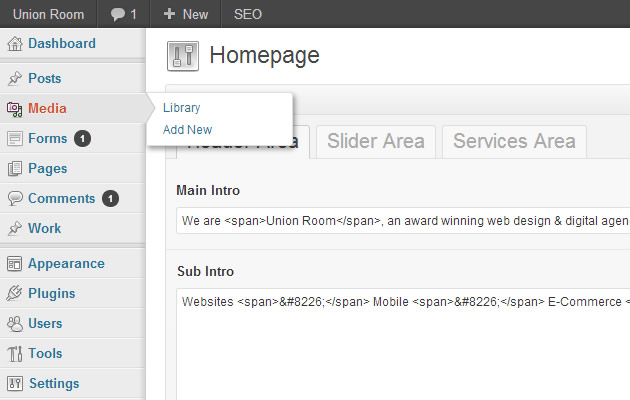
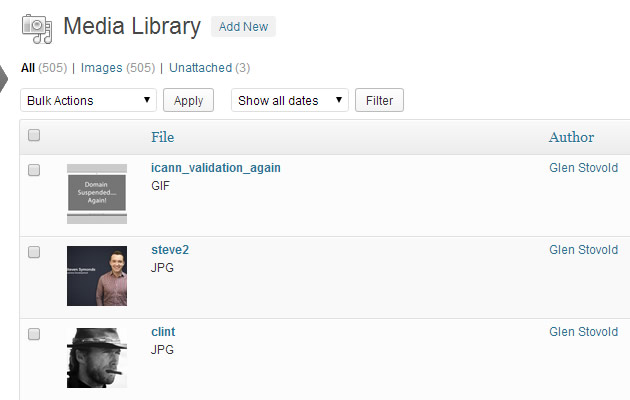
You can simply click on the ‘Media’ option, or click on ‘Library’ when the sub-navigation appears. Once you are inside of this area of WordPress, you will see a list of all of the latest media to be uploaded to the website.
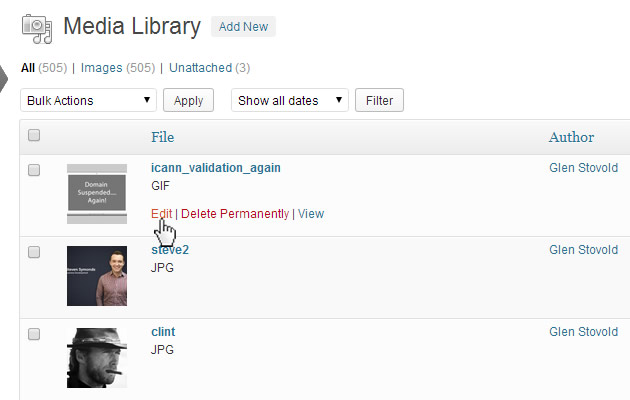
Find the image that you want to edit. Once found, you can mouse over the image’s row and you will see some options appear. Please click on the ‘Edit’ option.
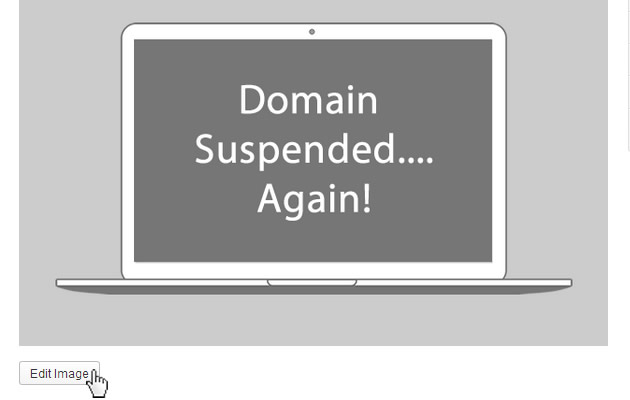
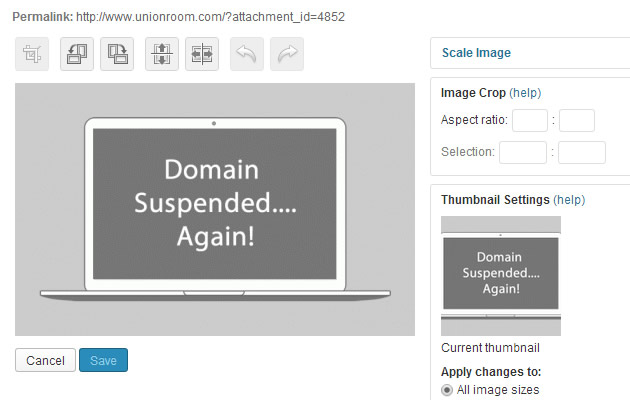
This will take you to the edit media page for that particular image. In this section you can change thing such as captions, alternative text and descriptions for that image. We want to carry out some aesthetic changes to the image however, so go ahead and click the ‘Edit Image’ button that is located underneath the image itself.
You are now in a section of WordPress that will allow you to edit the image itself. The icons above the image will allow you to perform the following actions:
- Crop.
- Rotate counter-clockwise.
- Rotate clockwise.
- Flip vertically.
- Flip horizontally.
- Undo changes.
- Redo changes.
1. Cropping
If you want to crop the image, simply use your mouse to draw a square on the image itself. You will see that handles appear, which can be dragged around to fine tune the area that you are cropping.
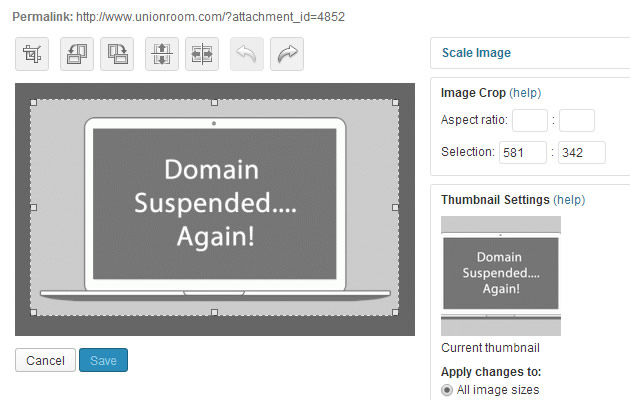
Once you are happy with your selection, you can click the crop icon that sits above the image. Your image will then change to the size of your selection. If you’re happy with your changes, you can click the blue ‘Save’ button which will update your image with the changes you have made. If you’re unhappy with the crop you have carried out, you can click on the ‘Undo’ icon which will revert back to the previous version of the image.
2. Rotating
Clicking on either the ‘Rotate counter-clockwise’ or ‘Rotate clockwise’ icons will rotate your image.
3. Flipping
Clicking on either of the ‘Flip vertically’ or ‘Flip horizontally’ icons will flip your image. This can be useful if you have uploaded an image which is upside down.
We will be posting a new WordPress hint or tip on a Wednesday, so keep an eye on our blog.